Sunday, November 14, 2010

Winter hats

I haven't been doing too much knitting lately. I seemingly lost my zest for knitting last spring and summer. I don't know if it was the change to warmer weather, but I still haven't regained the enthusiasm I once had for knitting. I once jokingly commented to my husband that I had more yarn than I could knit in a lifetime, and I think that it hit me this past year: yes, I do have more yarn than I will ever knit up, at least in MY lifetime. Sort of a bittersweet acknowledgment of mortality, I guess.

Even so, I am not one who can sit with my hands idle, so I did manage to complete two hats. The one below is from the latest Knitty.com (Fall 2010, Issue 33) and is called "Brambles." It was super easy and quick -- took me a few evenings of knitting. I used a worsted weight alpaca/wool blend yarn by Berrocco.


This next one took a bit longer. I actually started it last spring in an attempt to motivate myself but it just never happened. Anyhow, this fall I forced myself to complete it. The pattern itself was easy -- from Vogue Knitting Magazine (Fall 2009) but because the pattern called for fingering weight yarn, it took much longer to complete. The yarn is Colinette's jitterbug.
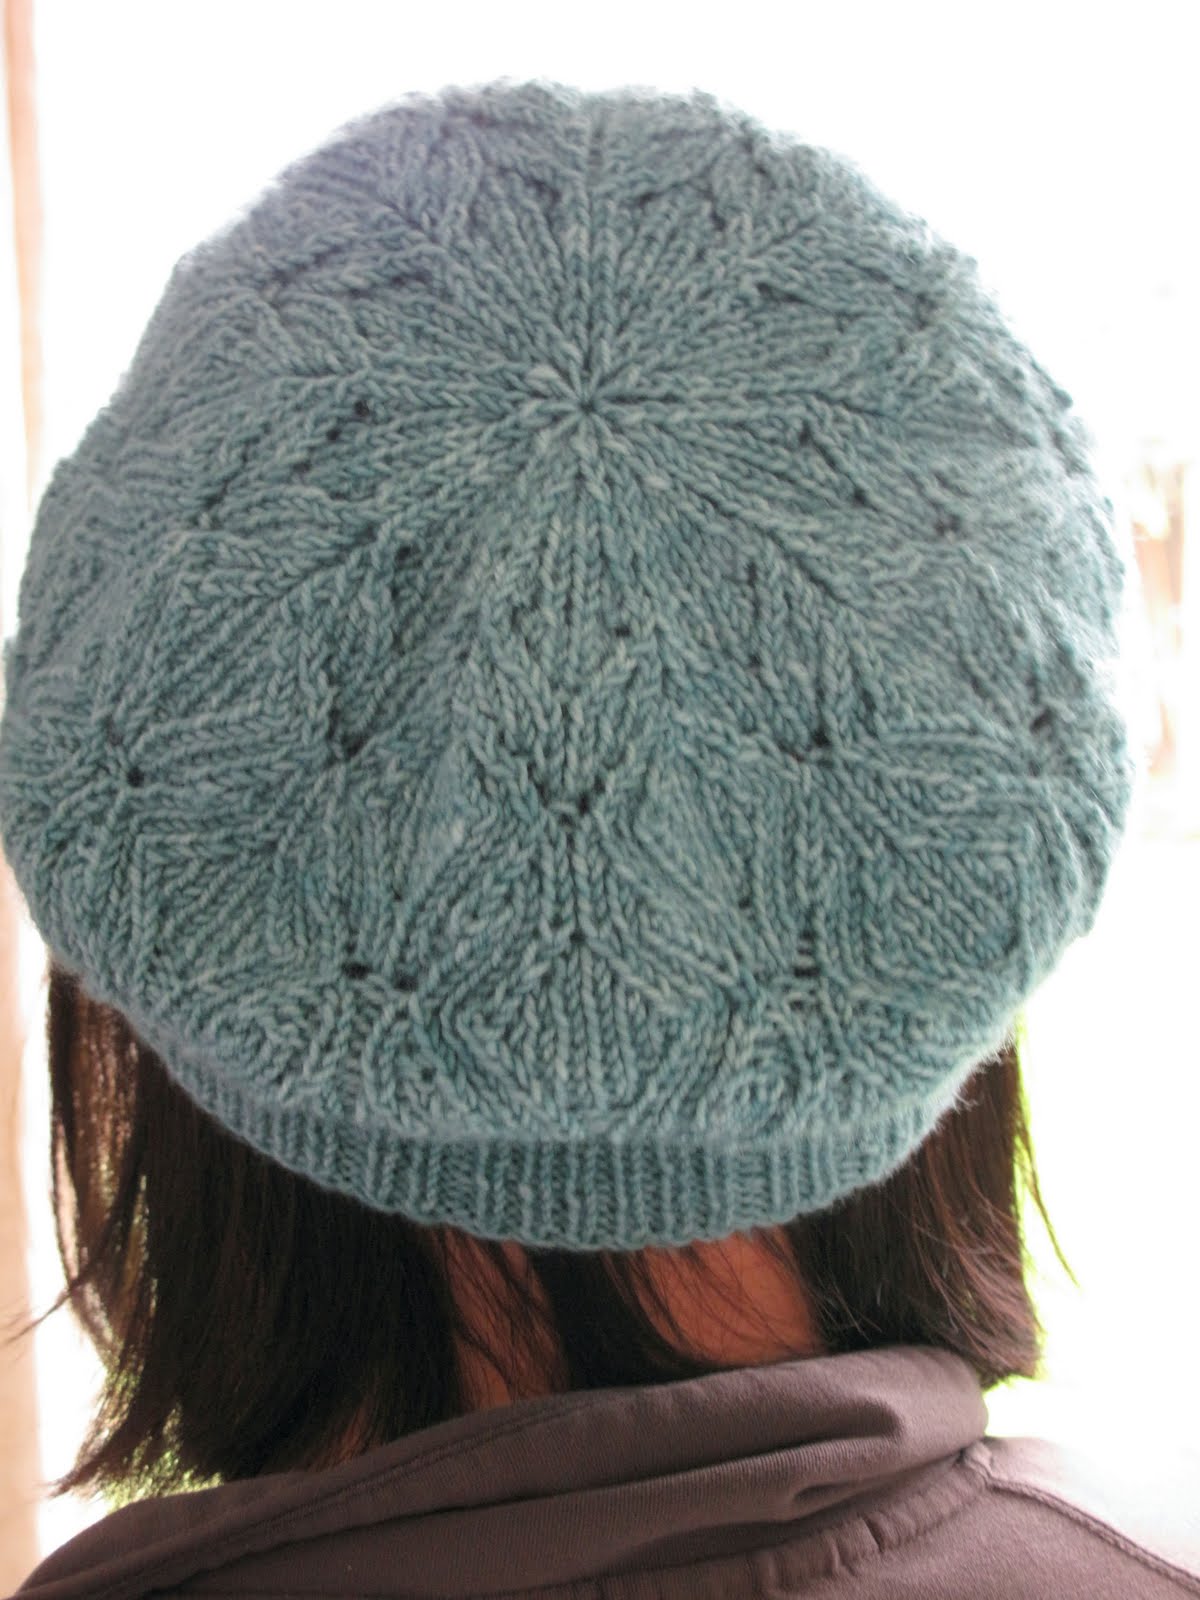


Both hats are destined to be gifts, most likely. I always plan on knitting one for myself, but the reality is that I'm not a hat person. Plus, for some reason, my almost-4-year-old always demands I remove hats and scarves when I put them on. Funny.

Friday, November 12, 2010

What I've been doing

I took a break from quilting to make winter flannel pajamas for the boys. So I've completed three pairs and have one more to go. Here is the best of the lot so far:


The pattern is Indygo Junction's Jack & Jill Jammies (IJ842). I modified the pattern by adding a 1/4" flat piping to the collar, pocket, and cuffs. I love how it turned out, and the jammies look super cute on #2. The one thing I might change on the next pair is to round out the collar to make inserting the piping a little easier. We'll see You can also tell I'm still on my aqua/blue and red kick. I love this color combination.

BTW, the fabric is Hooty Hooty by Doohikey for Riley Blake Designs. It's a nice scrumptious flannel that will wear very well.

Monday, October 18, 2010

Bridal Sampler, Blocks 3 - 5

Progress on the Bridal Sampler has been stalled by work on the Blissful Sampler, so these blocks have been finished for quite a while now. The top row is my scrap box pieces, and the second row is my Breakfast at Tiffany's bundle.

By far, the funnest block was the "posies" block in the middle. The flowers at each corner are machine appliqued using fusible web with the edges raw. I'm sure this might make some quilters gasp, but applique is definitely not my favorite. The third block, the star one, had alternate construction methods. The first one was paper piecing. I liked the preciseness of paper piecing, but I wasn't too fond of the center seams. The second method was method was just piecing. Although the streams do not have that nice crisp look, I do like how the center block is uninterrupted.

Tuesday, October 12, 2010

Scrappy Hunter's Star -- almost finished!

I thought I would go ahead and post the almost-finished quilt top, as I think I am running out of steam on this one. I might have to put it away for a while before taking it up again. It lacks a final border, which is in a dark green floral. I say that I might put it away for a while because I am not liking how the two inner borders came together. Plus, I really stretched out one of the sides while piecing it and am thinking of ripping both borders out to start again.


The details: the fabric is Origins by Basic Gray for Moda. The pattern is from "A Baker's Dozen," from the staff of That Patchwork Place. The pattern is kinda neat in that the entire quilt is made from a combined layer cake and jelly roll and measures about 85" x 85" when finished. Almost all the fabric with a few odds and ends are used. I'll post the directions for the blocks at a later date. As you can see, most but not all my points and corners matched up. But, the various prints are interesting enough that I think I can get away with it. One of these days I will have a precisely pieced top. :)

Tuesday, October 5, 2010

Sneak Peak

This is what I am currently working on. The fabric is Bonnie and Camille's Bliss for Moda. Can you tell by now that I love Moda? I especially love this line of prints and colorways. The big dilemma is which ones to buy, lots of turquoise, red, pink, brown, and green in this collection.


The Hunky Dory Snowballs

This is another quilt top I pieced over the summer. I love, love, love, the prints -- they're from Chez Moi's Hunky Dory for Moda. I bought it as a kit from Fabric Depot, but the pattern is available for free on Moda's website. It's just difficult for me to find the full range of prints called for in the pattern.

The construction itself was simple. It starts as an 8" x 8" square, fitted with 2" squares sewed into the corners into triangles, and then cut in half for the snowball. I do like the effect of the center panel. Interestingly, the center panel was the most difficult to cut, because I just couldn't get the fabric and pattern to form a straight line for cutting. Plus, the dimensions called for were bigger than any ruler I owned. I ended up making a paper pattern measuring 25" x 25". Each block is then surrounded by 2" sashing.

Here's a close up of one of the blocks, with my favorite print out of the line. For the backing, I bought the same print, but in a tan colorway.


PS. I should have ironed the quilt top before the photo shoot!

Crazy Pinwheels for #2

This is the quilt top I pieced for #2. It's been finished for awhile, but I'm still working out in my head how I want to quilt it -- and figuring out the logistics of the execution given my rather small Necchi.


Just a few comments on the construction. I did not use a pattern, but started with 5" squares that I made into HST (half-square triangles) and then trimmed to 4.5". The final quilt top measures about 50" x 80".
As you can see from this image below, I did get most (but not all) of the points to align.